Google’s popular operating system “Android” is evident of giant technology platform for mobile devices. Just like window operating system, Android is also an operating system designed for mobile users and continuously upgrade itself into the new version within various time intervals.
With each updated version, it brings more and masterful applications, features for their users.
As growing with technology, it’s now usual to operate emails using your mobile device and its give a comfortable approach for users who do not want to open his computer/ laptop for an email.
These mobile technologies make this possible to use your emails on your Android phones. Using Outlook on your Android phone is one of them as the Outlook is a well-known email client option for many of email client users.
Might be, some of Android users don’t have too much interaction with this section of “How to Set up Outlook in Android Phone” even they are completely aware about their Android device.
Step1.) Select and tap on the “Email” option in menu on Android screen. Its looks vary in different versions of Android.
Step2.) Fill your Email Address and Password and press on the “NEXT”.
Step3.) Choose any one type of account as per as your requirement from the below three options:
- POP3
- IMAP Account
- Exchange Account
(In this Article, we will select the POP3 from the above option for further process)
Step4.) At this step, you have to fill following details in the “Incoming Server Settings”:
- Email Address: your email address ( e.g xyz@healthywise.com)
- Username: usually the most of us type same email id in this option.
- Password: Make strong password as you think
- POP Server: Type the POP server information (pop.xyz@healthywise.com)
- Security: SSL
- Server Port: 110
- Click on Next button
Step5.) Same as previous step you have to type the Outgoing Server Setting, but to make thing clear, I am also sharing its information:
- Username & password: It should be same as Incoming Server Setting.
- SMTP Server: smtp.xyz@healthywise.com
- Security: None
- Server Port: 25
- Tap on the “NEXT” button after filling the server information.
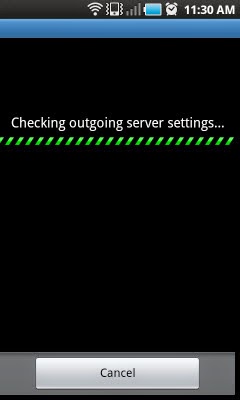
Step6.) Now, your Android Smartphone will check the server setting and establish a connection with it.
Step7.) After Setup the account and checking of connection visibility, you can choose this account for default to sending emails and click on Next button.
Step8.) Finally, fill the name in the email account and that will visible of outgoing emails.
Now, the process has been finished.


0 comments:
Post a Comment