


Experts know the steps to backup Office 365 email PowerShell command but they do not suggest it to novice users.
You shall find a ton of techniques to download your data locally for keeping it safe from several threats, yet, the perfect one is always unknown.
Don’t worry!
This article will explain the PowerShell method along with an alternative which, as said by professionals, is indeed the perfect solution.
All you have to do is install the below mentioned tool on your Windows OS machine.
Now, let’s learn a few things about Office 365 before learning to export email from Office 365 PowerShell.
Office 365 is a web-based suite offering several benefits and functionalities to grow your business.
The emailing services are amazing and it is one of the most used portal for exchanging sensitive information.
Since there is a lot of important data shared over the cloud, it should be noted that this data is always under a risk of loss.
Cloud is not a safe platform as the data you store on it can be hacked and used by other cloud users as well.
Hence, backup comes in handy.
Also Read: Office 365 Tenant to Tenant Migration – Microsoft Admin Guide
But, How to Backup Office 365 Email PowerShell?
Several users know that Office 365 data cannot directly be exported without getting into technicalities.
Yes, the PowerShell commands requires a certain amount of technical knowledge without which, it becomes difficult to create a backup of the data.
There is only so much that you will need to learn before executing the method if you are starting from the scratch.
It is really hard for a non-technical user to perform this procedure without having technical assistance.
Also, if you want to export email from Office 365 PowerShell, you need to fulfill some prerequisites and then get into the steps.
Pre-Requisites
To start with the method, you first need to ensure that all the following requirements are met with:
You should be an eDiscovery Manage or Administrator to start the process since it is the default role.
Make sure you have a remote connect to Office 365 Security & Compliance Centre.
After completing these requirements, you can execute the cmdlets to start the procedure.
What Are the Steps to Backup Office 365 Email PowerShell?
This can get complicated here so make sure you follow and execute each command carefully.
1. First of all, you need to use the New-ComplianceSearch cmdlet for creating a search before converting the data.
New-ComplianceSeaarch “your_name” –ExchangeLocation all | Start-ComplianceSearch
2. After that, export the data that has been given by the search by executing the given command.
New-ComplianceSearchAction “your_name” –Export –Format Fxstream
3. Here, you have to wait for the process to complete. Once it is done, you need to run the Get-ComplianceSearchAction cmdlet to export email from Office 365 PowerShell. Doing so will give you the URL needed to download the data.
Get-ComplianceSearchAction “your_name_export” –IncludeCredential | FL
After all of this is done, you will receive the result divided in two parts of information using which you can download the end file.
These will be having the Container URL and the SAS token which combine to form one URL.
When you have the URL, you can use the PowerShell method. But for that, it is important you have Exchange Server 2010 containing the Service Pack 1.
To backup Office 365 email PowerShell, open EMS & apply the following PowerShell command:
New-MailboxExportRequest –mailbox user1-filepath\\myserver\documentsfolder\name.pst
The direct path cannot be used in this method like E:/folder/name.pst. It requires you to follow the listed path on the network.
Also, make sure to check the user permission which can be done via the Exchange Admin.
Note: If you want to include any folder, you have to perform the add-includefolder cmdlet along with the name of the folder. To exclude any folder, execute the –executefolder command with the name in inverted commas.
Export email from Office 365 PowerShell to Include or Exclude Folders
To include the folder, apply the given code:
New-MailboxExportRequest –Mailbox ‘name’ –Filepath \\SRV01\PSTFiles\name.pst-IncludeFolders “#SentItems#”
For excluding a folder, use the following command:
New-MailboxExportRequest –Mailbox ‘name’ –Filepath \\SRV01\PSTFiles\name.pst-ExcludeFolders “#Drafts#”
Use the below given command to export the data from a certain time-duration:
New-MailboxExportRequest –ContentFilter {(Received –It ‘date’) –and (Received –gt ‘date’)} –Mailbox ‘Name’ –Filepath \\SRV01\PSTFiles\Name.pst
Wait until the export process completes.
There are various negative aspects of this method that makes the process complicated and wastes a lot of time.
Drawbacks of the Backup Office 365 Email PowerShell Method
Clearly, it is a complex method and becomes lengthy due to the technicalities involved.
If you do not have the technical knowledge required, it becomes difficult to go through the procedure.
One single mistake can lead all the proceedings to go in vain and you will have to start the process again.
Takes a lot of time to complete this operation.
Professional Alternative Method to Manually Creating a Backup
If you want to overcome all the aforementioned drawbacks of the process to export email from Office 365 PowerShell, use the Most Secured Office 365 Backup Tool.

Now, you must be thinking why to use a tool.
Well, you should consider using the software because these are always tried and tested by experts.
Also, there are a great number of features that can be used for downloading the data to a safer place.
Since there are many complexities associated with the manual method, it is not a suitable choice for every user.
So, to ease up the operation, go for the tool instead of using the backup Office 365 email PowerShell method.
Go through the given steps:
1. Run the software on your machine and activate it. Choose Office 365 as your Source platform and Outlook as your Destination platform.

2. Now, mark the checkbox beside Email option in the Categories section and apply the Date-filter for selective data migration.

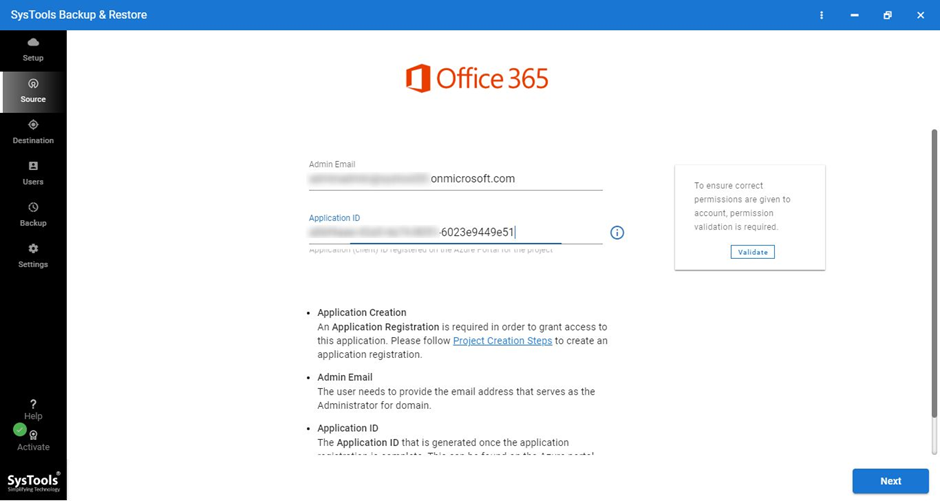
3. To start, fill in the details of Office 365 admin account in the asked fields and hit Validate to assign permissions. Press Next.
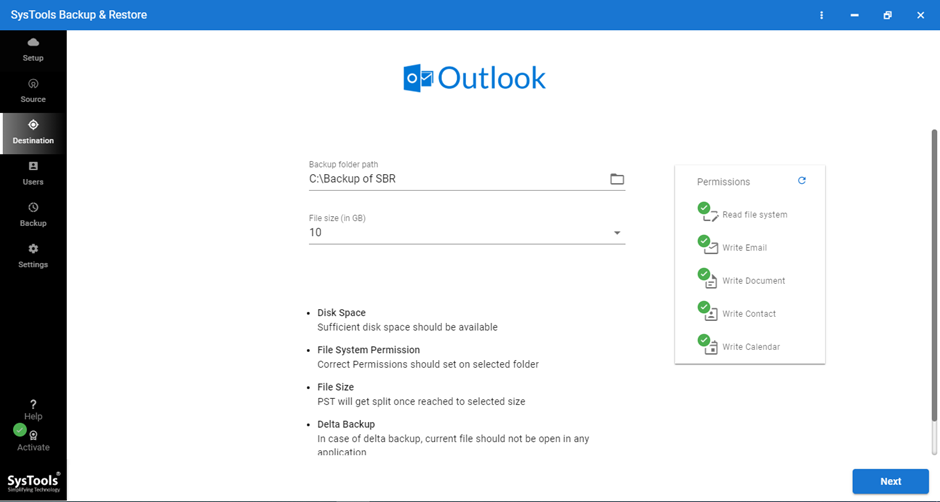
4. In the Destination window, enter the destination and the size of the files to be created in Outlook. When you export email from Office 365 PowerShell, it doesn’t allow you to Validate the permissions.
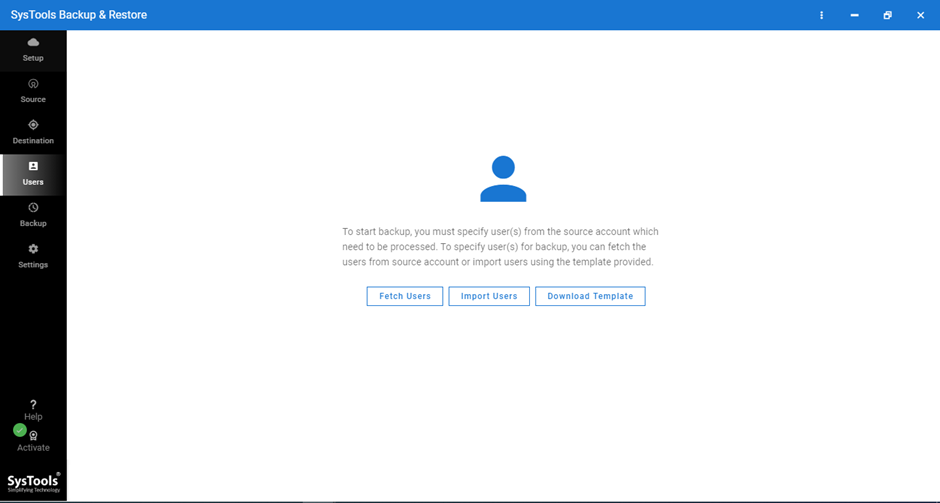
5. Add the user mailboxes by choosing one of the given options i.e. Fetch Users and Import Users.
6. Here, set the priority for the mailboxes you want to export earlier than others and tap the Start Backup option.
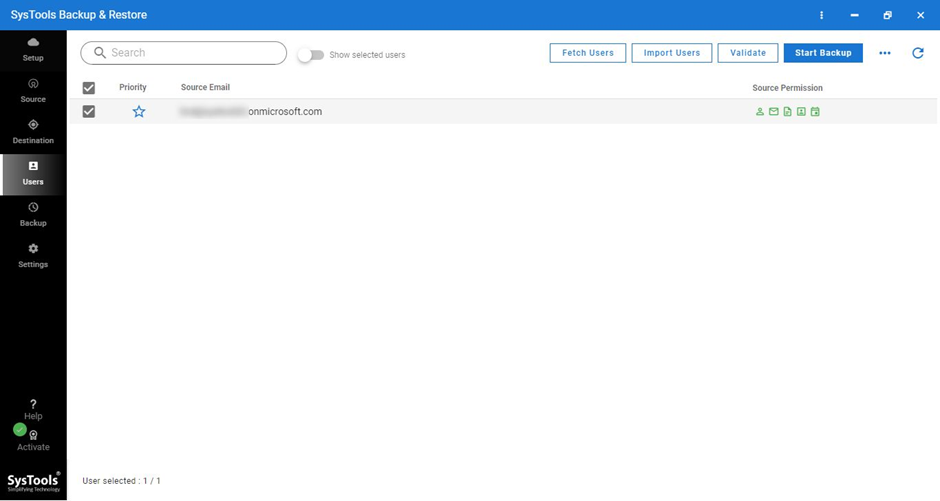
If in case there are certain emails that may have arrived after the first process, choose the Delta Backup option to export only those emails.
Run the procedure again if required via Re-Run Full Backup or Retry Failed Items features.
Final Verdict
To backup Office 365 email PowerShell is not an easy task. PowerShell commands need a lot of technical expertise to be executed which not every user has.
So, the alternative method is explained for helping users get a much simpler and innovative solution for the same operation.


0 comments:
Post a Comment